Where to go in the dashboard
Sign in to your vendor dashboard and open the Services tab in the left menu. The tab name may show as Services, Sessions, or Events depending on your business type.
- Use the main list to see everything you offer and whether each item is active.
- Select Add New (or the equivalent button) to create a service.
- Open an existing row to edit details, pricing, staff, or booking rules.
Help on the form (not on every field)
When you open a create or edit form, look for the (i) icon next to the form title—for example Create Service, Create Session/Class, Add Staff Member, or Payment Settings.
- One help tooltip sits on the whole form, not on individual fields.
- Hover or tap the icon for a short summary of what that form is for.
- Select the link inside the tooltip to open the matching guide in Help Center.
- Use this article for the full section-by-section walkthrough below.
Where help appears today
Form-level help is on service create/edit, staff create, coupon create, payment settings, and business holidays. Other dashboard tabs use these guides without an in-form icon.
Your business category picks the form
When you select Add New, Tuvy reads the business category from Settings → Business Settings and opens the matching form automatically. You do not choose Appointment vs Class vs Event on a separate screen in normal use.
Set category before you create
If the wrong form appears, update your business category under Settings → Business Settings, then create a new offering. Editing an existing item keeps the same form type it was created with.
- Appointment businesses — time-slot booking (duration, variants, add-ons, staff per slot).
- Class / session businesses — recurring schedules (class, term, or package pass models).
- Event businesses — one-time events with dates, tickets, and capacity.
Which form each category uses
Primary business categories map to one of three create forms:
- Appointment form — Automotive Services; Beauty & Wellness; Home Services & Cleaning; Kids & Parenting Services; Professional Services; Tech & Digital Services; Trades & Repair; Other.
- Class / session form (recurring) — Dance, Music & Performing Arts; Education & Tutoring; Fitness & Sports.
- Event form (one-time) — Events & Activities.
The sidebar label for this tab also follows your category: Services, Sessions, Classes, or Events.
Appointment form — sections on screen
Modal title: Create Service (Appointments). Scroll through the sections below—the (i) icon on the form title gives a quick summary, not help on each field.
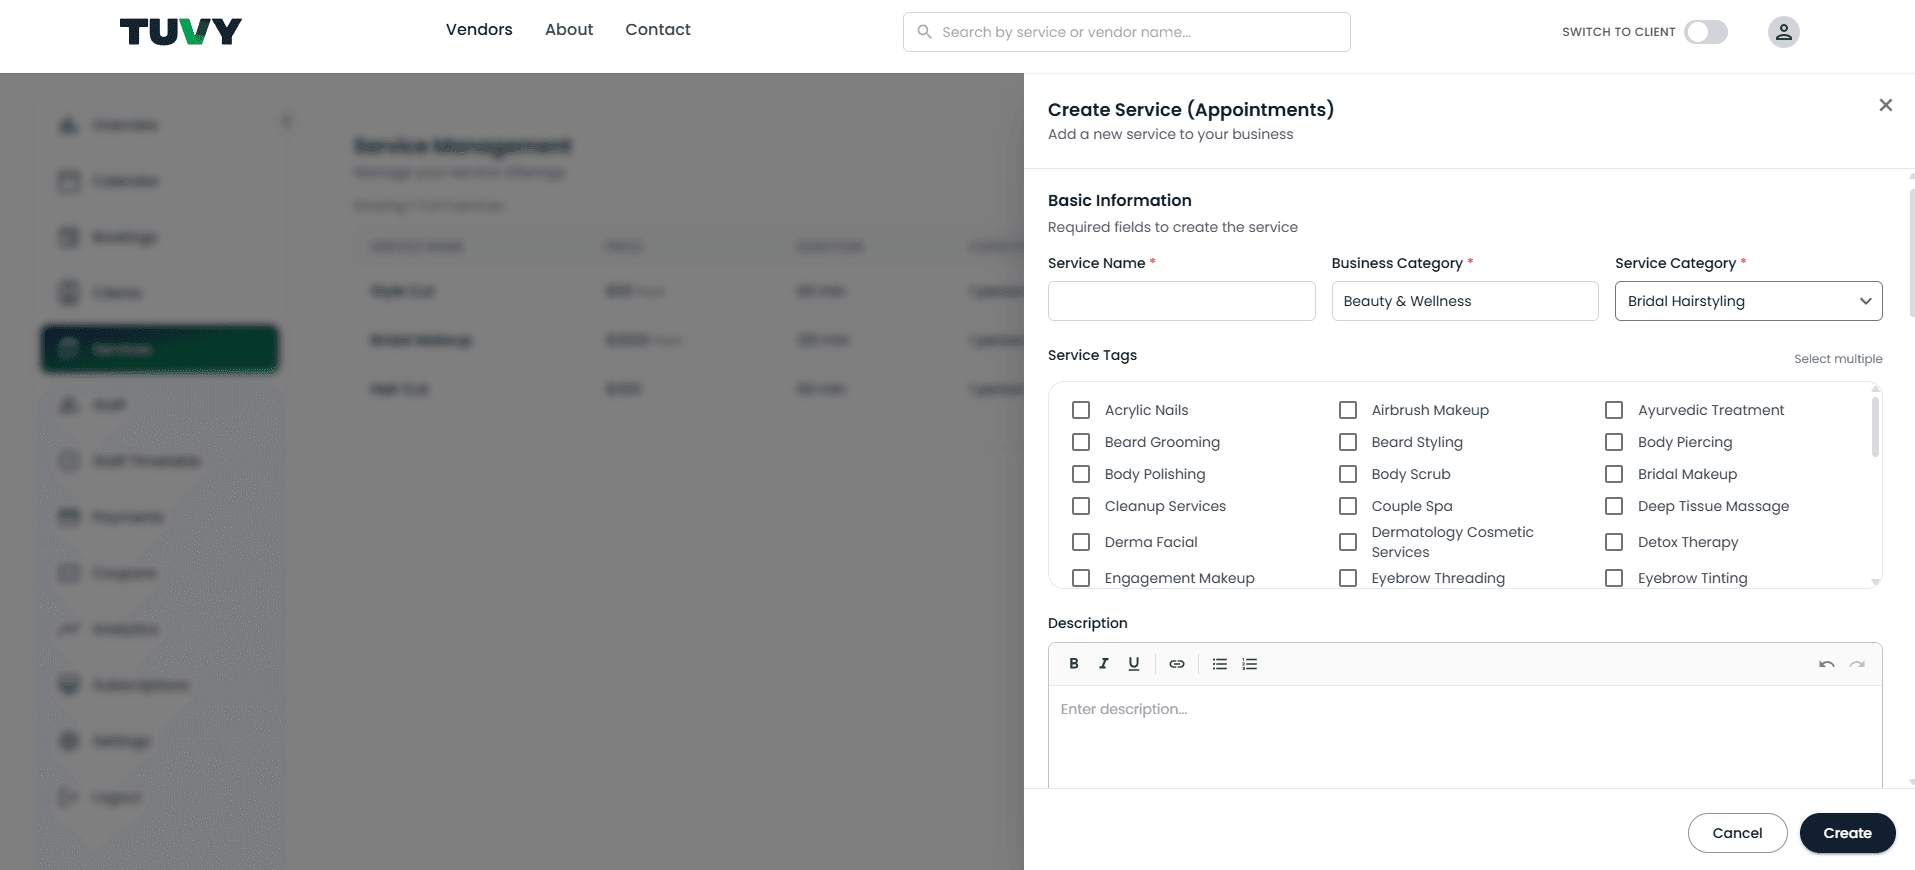
- 1Basic Information — Service name, Business category (read-only), Service category, Search keywords, Description, Booking instructions.
- 2Pricing and duration — Price type, price, duration, parallel slots, buffer time; optional Variants and Add-ons.
- 3Staff Assignment — Select staff (required); per-staff price when variants are used; Keep me as a staff member if you deliver the service.
- 4Location — In person, online, or hybrid; address or meeting link.
- 5Payment Configuration — Pay online / pay in person, Worldline or Stripe options, transaction fees.
- 6Attendance Type — How the client attends (physical, online, hybrid).
- 7Service Images — Upload photos clients see on your listing.
- 8Service Status — Active checkbox to show or hide from booking.
Optional at the bottom
Some appointment services include Allow clients to book this as a recurring appointment when you want repeat bookings on a schedule.
Class / session form — sections on screen
Modal title: Create Session/Class. Used for Fitness & Sports, Education & Tutoring, and Dance, Music & Performing Arts.
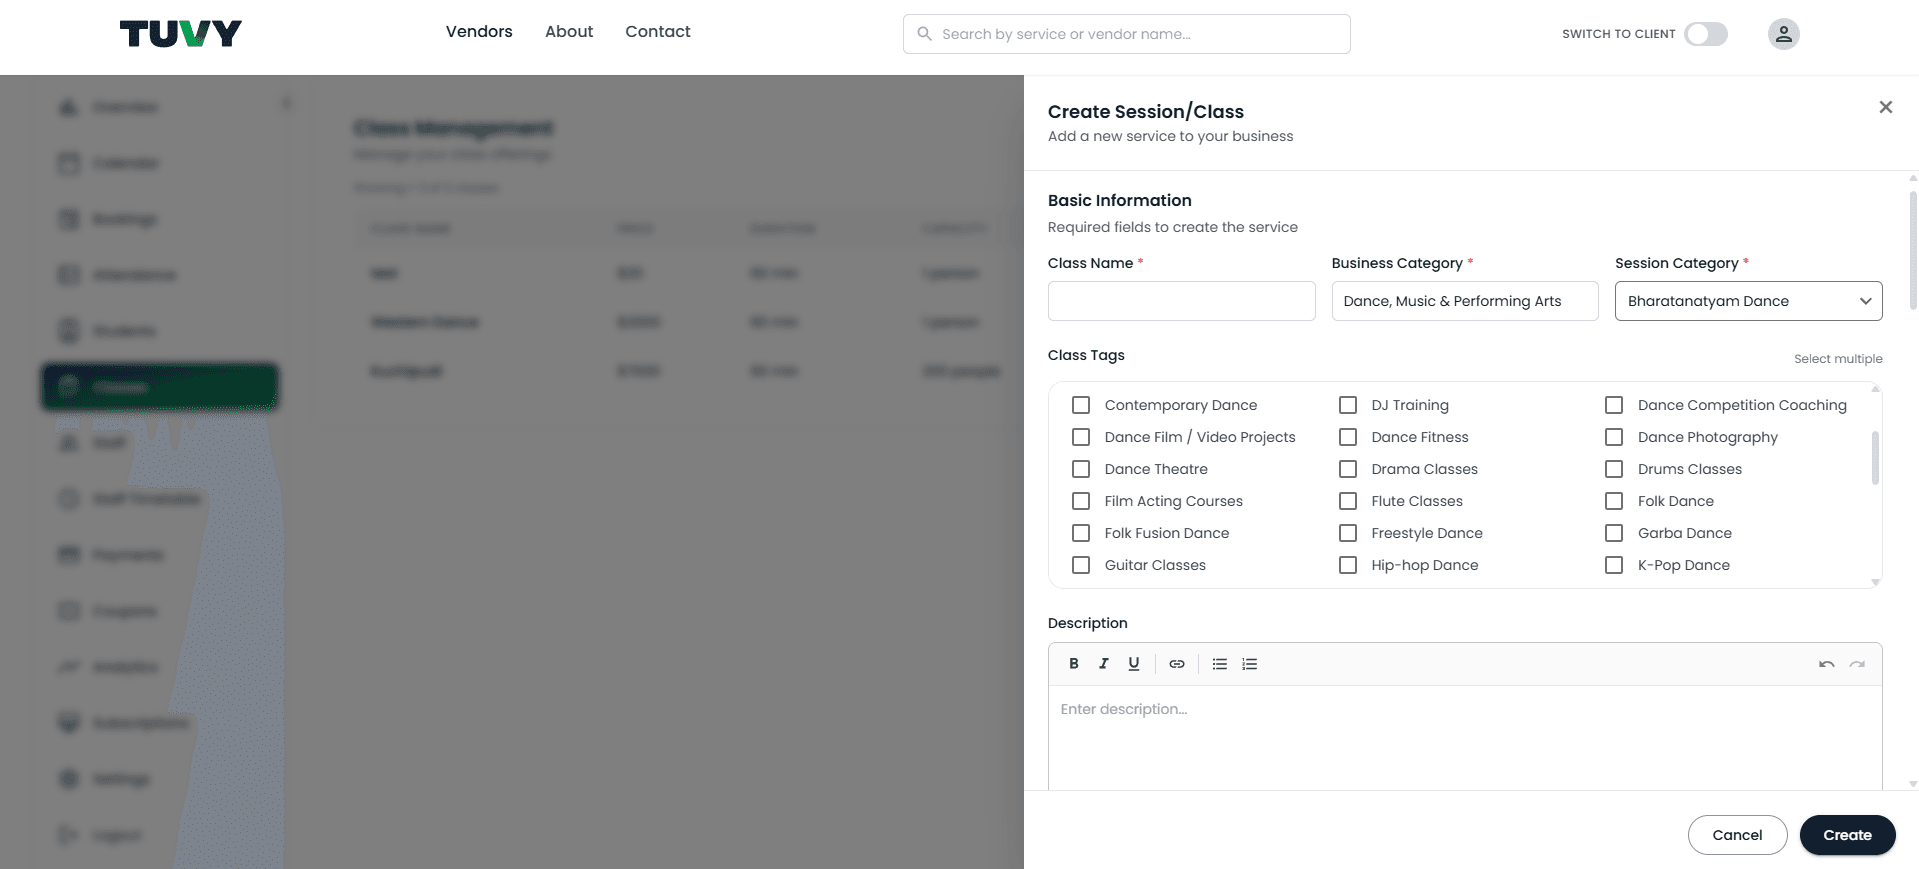
- 1Basic Information — Session or class name, Business category (read-only), category and search keywords, Description, Booking instructions.
- 2Configuration — Price type, price, duration, capacity, and related class settings.
- 3Recurring Booking Options — Booking model: Class, Term, or Package pass; schedule, dates, excluded dates, and term pricing where applicable.
- 4Staff Assignment — Required for class and term models (hidden for package pass); staff price; Keep me as a staff member toggle.
- 5Location — Where the class takes place.
- 6Payment Configuration — Online and in-person payment options.
- 7Attendance Type — Physical, online, or hybrid.
- 8Service Images — Listing images.
- 9Service Status — Active when the schedule is ready for booking.
Attendance tab
After clients book, use the Attendance tab in the dashboard to mark attend / not attend per session date.
Event form — sections on screen
Modal title: Create Event. Used when your business category is Events & Activities.
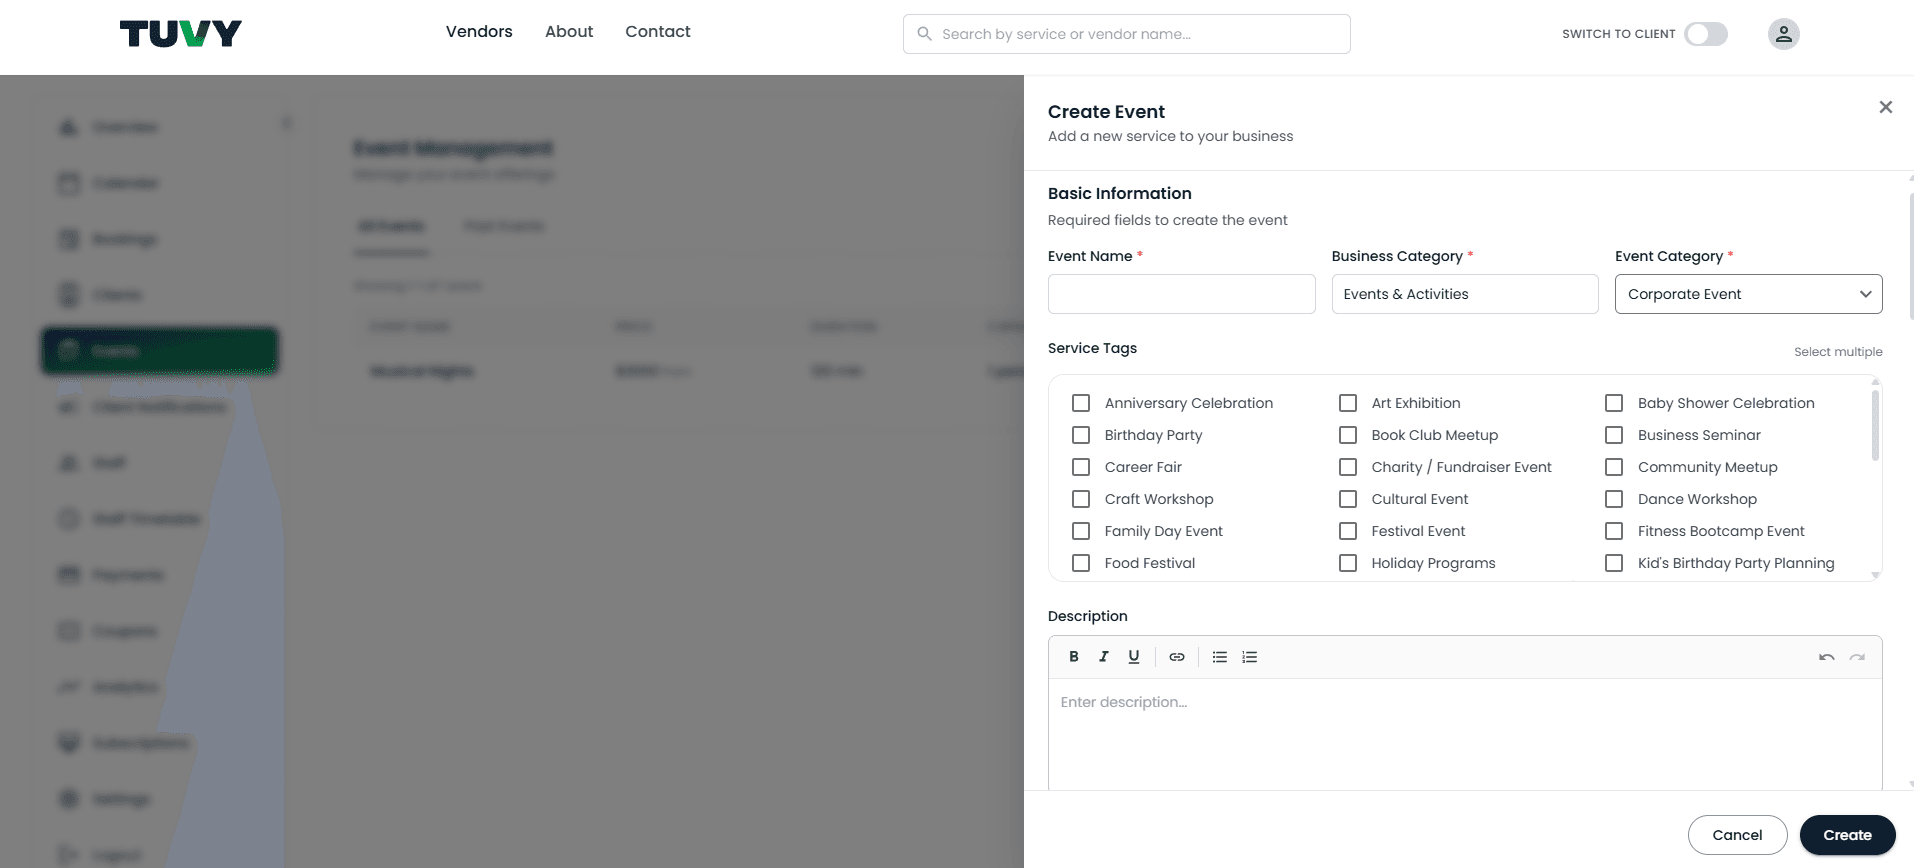
- 1Basic Information — Event name, Business category (read-only), Event category, keywords, Description, Notes, Start date & time, End date & time.
- 2Configuration — Price type, price, duration, capacity (when not using paid ticketing only).
- 3Location / Online Meeting — Offline venue or online event link.
- 4Ticketing & Capacity — Free or paid event, ticket types, and capacity rules.
- 5Seating Plan — For offline seated events (optional).
- 6Check-in Method — How attendees check in (for example email or QR).
- 7Event Images — Photos for the event listing.
- 8Event Status — Active only for future events.
- 9Payment Configuration — Shown for paid events; payment methods and fees.
Client Notifications
After publishing one-time events, use the Client Notifications tab to send updates to ticket holders.
Create or update an offering
- 1Confirm your business category under Settings → Business Settings.
- 2Open the Services tab (may show as Sessions, Classes, or Events).
- 3Select Add New — wait briefly while the correct form loads.
- 4Complete the fields shown for your form type (see sections above).
- 5Assign staff and set payment options before saving.
- 6Set active when you are ready for clients to book.
- 7Save, then check your public vendor page and place a test booking.
Name it clearly
Clients should understand the title at a glance. Put extra detail in the description, not in the name.
Day-to-day management
- Deactivate a service temporarily instead of deleting it if you may offer it again later.
- Deleting removes future sessions tied to that service — only delete when you are sure.
- Events & Activities vendors see All Events and Past Events sub-tabs to separate upcoming and finished events.
- After changing price, staff, or hours, test a client booking to confirm availability still looks right.
Related guides
Manage staff, services, payouts, and leave
Add team members, assign services, review payouts, and control availability using Staff and Staff Timetable.
Manage bookings
View, filter, and update bookings from the Bookings tab — including status, payment, and schedule changes.
Use the calendar
View assigned services and bookings by day, week, or month, filter by staff, and create bookings from the calendar.